As a kid, I loved having granola bars for a mid morning snack at school. They were usually chocked full of chocolate and all around too much sugar. Cutting out unnecessary sugar is key to living a long healthy life, and this recipe helps to feed you and your family a healthy snack that will be sure to bring smiles to everyone’s faces!
I discovered these just a couple weeks ago and am quite addicted!! I recently made them for a brunch I threw and they were a big hit!
These can be make relatively quickly and you don’t even need to use the oven if you don’t want to! They can be customised to suit your liking and can be make a different way each time! Here are a few tips when making these granola bars:
Granola Bar Rule #1: Ratio is key
You will need 5 ½ cups dry to 1 ¾ cup wet ingredients to make these the perfect chewy consistency.
Granola Bar Rule #2: Use a thick, sticky syrup
Rice malt syrup is my choice. Unfortunately thinner syrups like maple or honey do not hold up the bars enough.
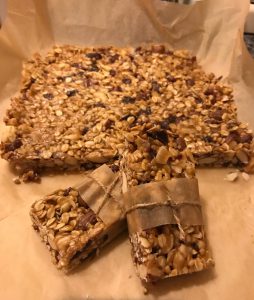
Who doesn’t need more granola bars in their life? Go ahead. Try it. Change it. Love it. I guarantee you. Your life will never be the same.
How To Make No Bake Granola Bars From Scratch
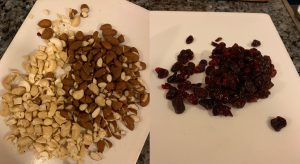
Start by chopping up 1 cup of your choice of nuts and 1 cup of your choice of dried fruit. Feel free to mix two different types of nuts or fruit, I used almonds, cashews, dried cherries and cranberries.
Optional Step: Toast the oats, coconut and nuts in the oven at 200C for 5-7 minutes.
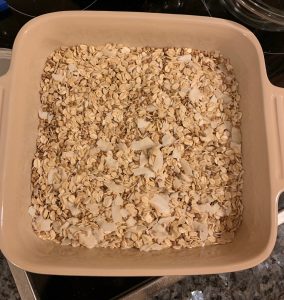
Pour the oats, rice bubbles, coconut, nuts and fruit into a large mixing bowl.
*Don’t be afraid to replace any of the dry ingredients. I have used buckinis, pumpkin seeds, sunflower seeds, toasted germ wheat. Use whatever takes your fancy! Introducing Rule #1. Ratio is key. You can use any dry ingredients here as long as you have an equal amount of 5 ½ cups.*
In a smaller microwaveable bowl, add creamy peanut butter (or sunflower butter for nut-free!) and rice malt syrup. Make sure that you have 1 ¾ cup total in your bowl here. Stir it all together and microwave on High for 1 minute.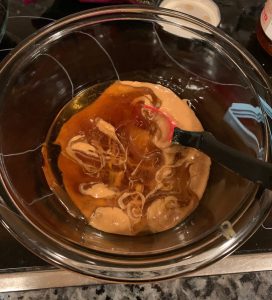
Pop it back in the microwave for another minute on High and stir the hot mixture once again. Now, add the honey and vanilla. (You can replace the honey with molasses if you are vegan!)
Stir again until nice and smooth…and try not to lick the spatula! Slowly pour the mixture into the bowl of dry ingredients and stir until combined.
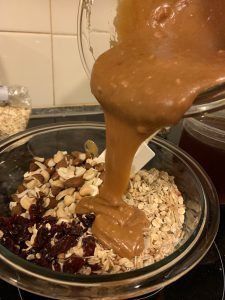
Pour it all into a 13×9 baking dish. It should come out of the bowl very easily.
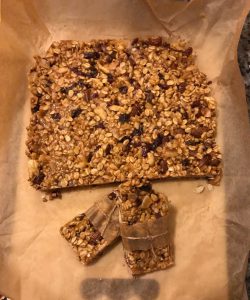
Leave them out on the counter until cooled. Then feel free to put them in the fridge if you like them chilled, but they do not have to be kept in the refrigerator. Depending on size, cut 12 – 16 bars out.
How Long Do Granola Bars Last?
You should eat them within 2 weeks or wrap them up and pop them in the freezer for long term storage.
Healthy Granola Bar Recipe
These no bake healthy granola bars are simply the best! What I love is that they are totally adaptable to you, they can be a bit different every single time. Try different ingredients to find your favourite combination to enjoy these healthy granola bars!
Ingredients:
- 1 ½ cups rolled oats
- 1 ½ cups crisp rice cereal (i.e. rice bubbles)
- 1 cup chopped nuts
- 1 cup chopped dried fruit
- ½ cup coconut
- ¾ cup creamy peanut butter
- 1 cup rice malt syrup
- 2 Tbls honey
- 1 tsp pure vanilla extract
- 1 tsp cinnamon
Instructions:
- Chop 1 cup of your choice of nuts and 1 cup of your choice of dried fruit.
- Optional Step: Pour oats, nuts, seeds and coconut onto a baking tray and pop in the oven at 200C for 5-7 minutes to slightly toast.
- Pour all dry ingredients into a large bowl.
- Stir the dry ingredients together.
- In a smaller microwaveable bowl, stir together ¾ cup creamy peanut butter and 1 cup rice malt syrup.
- Microwave on High for 1 minute. Stir, and then microwave another 1 minute.
- Stir in your honey, vanilla and cinnamon.
- Slowly pour the wet mixture into the bowl of dry ingredients and stir to combine. Stir until it is all evenly covered in the wet mixture.
- Line a 13×9 pan with baking paper to make it easier to remove.
- Pour it all into a 13×9 pan.
- Press it down hard with a flat spatula.
- Let them cool and pull the bars out of the pan and cut into 12-16 bars depending on how big you want the bars.
- Can be refrigerated, frozen or left on the counter.
